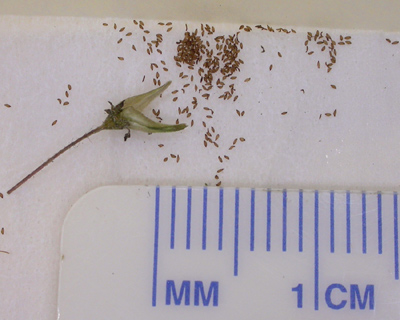
Sinningia seeds

Sinningia seeds

Ultimately, this is how all gesneriads -- and, in particular, all sinningias -- start life.

This picture, from Dale Martens, shows seeds and the fruit that bore them.  The ruler shows the dimensions: the seeds are less than 0.5 mm long.

This particular species is Sinningia pusilla, but seed size is remarkably similar throughout the genus.  Seeds of a big species like S. warmingii are about the same size as those seen here.

Each of those seeds contains a genetically unique plant.  The plant is dormant, with rudimentary embryonic structures, but already with many cells.


How Dry I Am

The main property of this plant is that it is dry: in order to make the seed last as long as possible, the mother plant has extracted almost all the water from it.  From the energy standpoint, this is a very expensive process, because it is, in effect, pumping water uphill.  Water is being pulled from the increasingly water-poor region -- namely, the seed -- and transported to the water-rich region -- namely the mother plant.  The energy cost of this water extraction is a major component of the energy budget of making a seed.

Why does the mother plant do this?

Water is the enemy of preservation.  Mummies which last 4000 years in the Egyptian desert wouldn't last 40 days in Hawaii.  Water enables chemical reactions.  This is good when suitable conditions for growth are present but not good when the water is from the mother plant and the world outside is cold and dry.

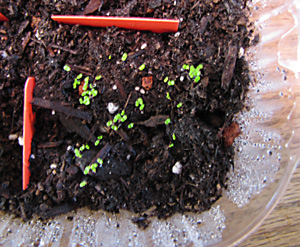
Therefore the seed is set to wait for the time when there is enough warmth and water from the environment for it to grow on its own.
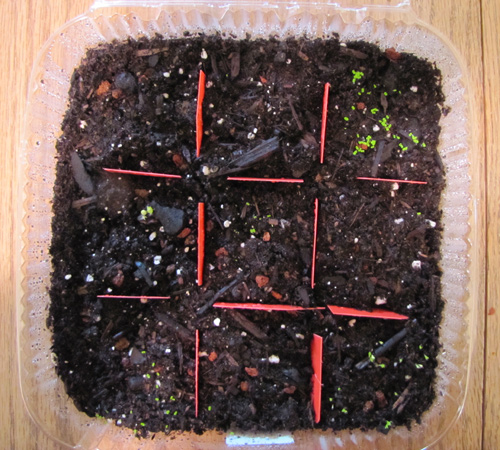
Seed Love

In 1996, at the Gesneriad Research Foundation seminar in Sarasota, hosted by Hans Wiehler, the participants were all asked to name their favorite gesneriad.  I had no trouble answering: a seed.

For me, a seed is a plant I haven't ruined yet.  It's full of promise and hope, the possibility of being the greatest thing since dark chocolate, and yet a complete plant sitting there in its hard envelope, waiting for just the right conditions to come along.

(This wasn't the answer expected of me.  I was supposed to say "unifoliate streptocarpus", one of my enthusiasms at the time, and which I dutifully supplied after sufficient prodding.  
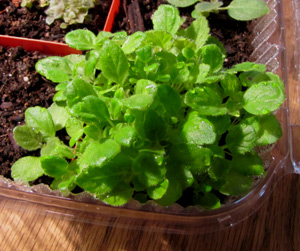
Even so, you can see that unifoliate streps are just seeds after a certain amount of development, so the principle remains.  Seeds are what growing is about.)

How I Sow Seeds

There are as many methods for sowing seed and raising seedlings as there are growers.  Here is mine.

This is a tray of seeds I sowed on 10 January 2011.  The picture, taken 14 days later, shows that some seeds have already germinated.

Seed tray

My procedure is always essentially the same.

  1. Fill a plastic clamshell tray with potting soil.  In general, I use the same potting mix that I use for mature plants.
  2. Cut four plant labels into three pieces each, to use as dividers.  Place them as shown in the picture.
  3. Moisten the soil.
  4. Close the tray lid and microwave the tray for about a minute.  Then turn the tray 90 degrees and microwave it for another minute or so.
  5. Write a label showing the indentifier for the tray and the date of sowing, and affix it to the bottom front of the tray.  This label can be seen at the bottom of the picture.  The label is applied to the bottom half of the tray so that if the lid is ever removed, the label stays with the tray.
  6. Sow the seed.
  7. Put the tray in a warm place.  My usual location is the top of my one fluorescent fixture.
  8. Wait.

I have no idea whether microwaving the soil does any good.  I suspect the soil does not get hot enough to kill any nasty microorganisms.  At least the process does not seem to do any harm.

Some people have problems with moss growing in their seed trays and pots.  I almost never have that experience.  I attribute this not to the microwaving but to my choice of potting mix, which presumably doesn't contain the moss spores.

With this system, I sow nine different types of seed in the same tray.  This has two advantages:

  • It's less work than sowing nine individual pots.
  • Since all nine sections are treated identically, I can be pretty sure that any failure to germinate is due to the seed and not to some bad property of the potting mix or bad technique -- as long as at least a few batches of seeds germinate.  This is especially helpful in the case of hybrid seed: no germination strongly implies that the cross was unsuccessful.
Seed tray
Seed tray

This shows the upper right hand corner of the tray after 14 days (the same date as the picture above).  These are seedlings of Sinningia sellovii.

This shows the same section two months after sowing.  Normally, seedlings shouldn't be left this long in the tray.  However, I am a professional procrastinator on a closed course.  Do not attempt.

Mix and Match

Seed tray section

One important measure to take when sowing seeds in a community tray is to separate similar seed types.  Adjacent seedlings should be different enough to be distinguishable when they germinate.  This picture shows an area where three types of seedling have gotten jumbled.  Even so, there is no trouble telling the plants apart.

The majority of them are an epiphytic cactus, Rhipsalis warmingiana (aka Lepismium warmingianum, named after the same fellow as Sinningia warmingii).  The dark-leaved plant is Sinningia flammea, while the identity of the lighter-leaved plant is a little uncertain (it is probably Vanhouttea brueggeri).

Growing Up

The picture also shows elements of the fascination that seeds hold for me.  The main element is watching the infant plants develop the first individual characteristics.  The S. flammea seedling above already displays distinctive leaf features like the dark color and hairiness. Seedling cacti are best in this regard: most start out as little green balls and then begin to produce spines and structure. 

To show what I mean, here is a closeup of three two-month-old seedlings of Echinocereus bristolii.  The first spine clusters are just starting to develop.

You will note from this picture that I make no effort to make the potting mix uniform or remove the fragments of wood it contains.  The inhomogeneity of the mix does not seem to have any adverse effect on germination or growth.

The three seedlings will have to be transplanted soon to separate them.


And here, years later, is a flower from one of those Echinocereus bristolii seedlings.

Gratuitous cactus-flower picture, with one flower almost obscuring the entire plant.

The green stigma lobes are a good indicator that this really is an echinocereus.

(Most gesneriads have 2 or 4 stamens. Most cacti have dozens.)